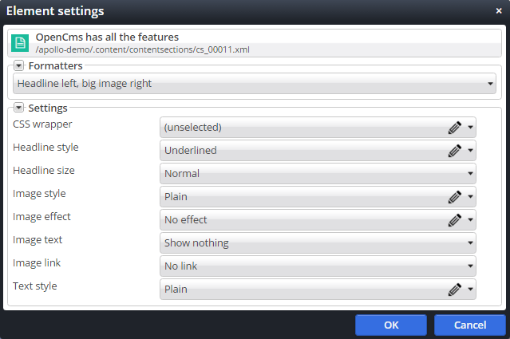
We assume a content with image, text and headline. Moreover, we have three basic formatters. One solely outputs the headline, one the image, one the text. All three formatters are disabled by default, such that they can not be used directly. The only formatters we want to use are macro formatters. These can combine one up to all three of the basic formatters.
With the introduction of nested containers it becomes possible to build up a website from layout elements and "real" content elements, that render text or images. In particular in combination with responsive design frameworks this technique proved to be very powerful. But to wrap the full flexibility of a responsive design framework in your template, you either had to write very complex formatters, or dissect your contents into very tiny snippets and loose semantical relations, or force the editor to place the same content several times but rendered with different formatters on the same page. Macro formatters tackle that problem. They allow to write several "normal" formatters that only render parts of a content and glue them together in the macro formatter.
Macro formatters allow to build a new formatter from existing ones. Macro formatters basically glue "normal" formatters together by arranging their output in an HTML structure, referencing each individual formatter via a macro. Moreover, they accumulate all element settings of the individual formatters and support additional settings as well.
A macro formatter is a content of type "Macro formatter". You can either place it in the module, or in a .formatters folder in the site. Add it via the explorers "Create resource" wizard. Macro formatters are found under "Configurations".
The macro formatter combines formatter and configuration in one content. Editing the content you see three tabs:
- Basic configuration: Configuration as known from formatter configurations
- Macro: Writing the HTML snippet and linking to the formatters that are glued together
- New Content: Set what should be rendered when a new element is added or set a default content
- Supported settings: Configuration of additional settings of the macro formatter, similar to the settings configuration in formatter configurations. And also similar to formatter configurations, you can set a configuration file of frequently used element settings as described in common element settings.
- Meta mappings: You can set which values should be inherited to the page template. Read here about meta mappings.
For basic configuration and supported settings, refer to documentation of the formatter configuration. The options from the macro tab, we discuss below.
To define the macro, wee add the formatters that we want to use in the macro and declare a name for them - here it's one for headline, one for text and one for image. Then you write the macro HTML snippet with a %(formatter_name) used whereever the formatter with name formatter_name should be rendered. Additionally to %(formatter_name), we can use %(settings.settingname) to read element settings defined in the "Supported settings" tab.
<div>or other block element to be displayed correctly.Macro formatters build a new layer of abstraction. The target is to reduce development complexity. Once suitable formatters for special content parts (text, image, headline, ...) are defined, they can easily be combined. Writing JSPs is only necessary for that basic formatters - and even these will become less complex. The combination of the basic formatters requires solely HTML and some macros. Hence it can be done by differently skilled persons as well. Thus, you are enabled to define the set of customer specific formatters easily from a set of basic formatters that may be reused.
Hiding basic formatters bears an advantage. Basic formatters do not need a surrounding <div> if not used directly. Hence, output is even more flexible. You may benefit from that flexibility when writing the macro formatters.
Name element settings of the basic formatters suitable. All element settings of the basic formatters will also be available in the macro formatter. So name them suitably, e.g., prefixing them with "Headline", "Image", "Text" etc.

