Skip to content
OpenCms documentation

Accounts app

group

The accounts app is an administrative tool to manage organizational units, groups, as well as users and their roles. The app is accessible for workplace users with role Administrator or alternatively with role Account manager.

The user interface of the accounts app.

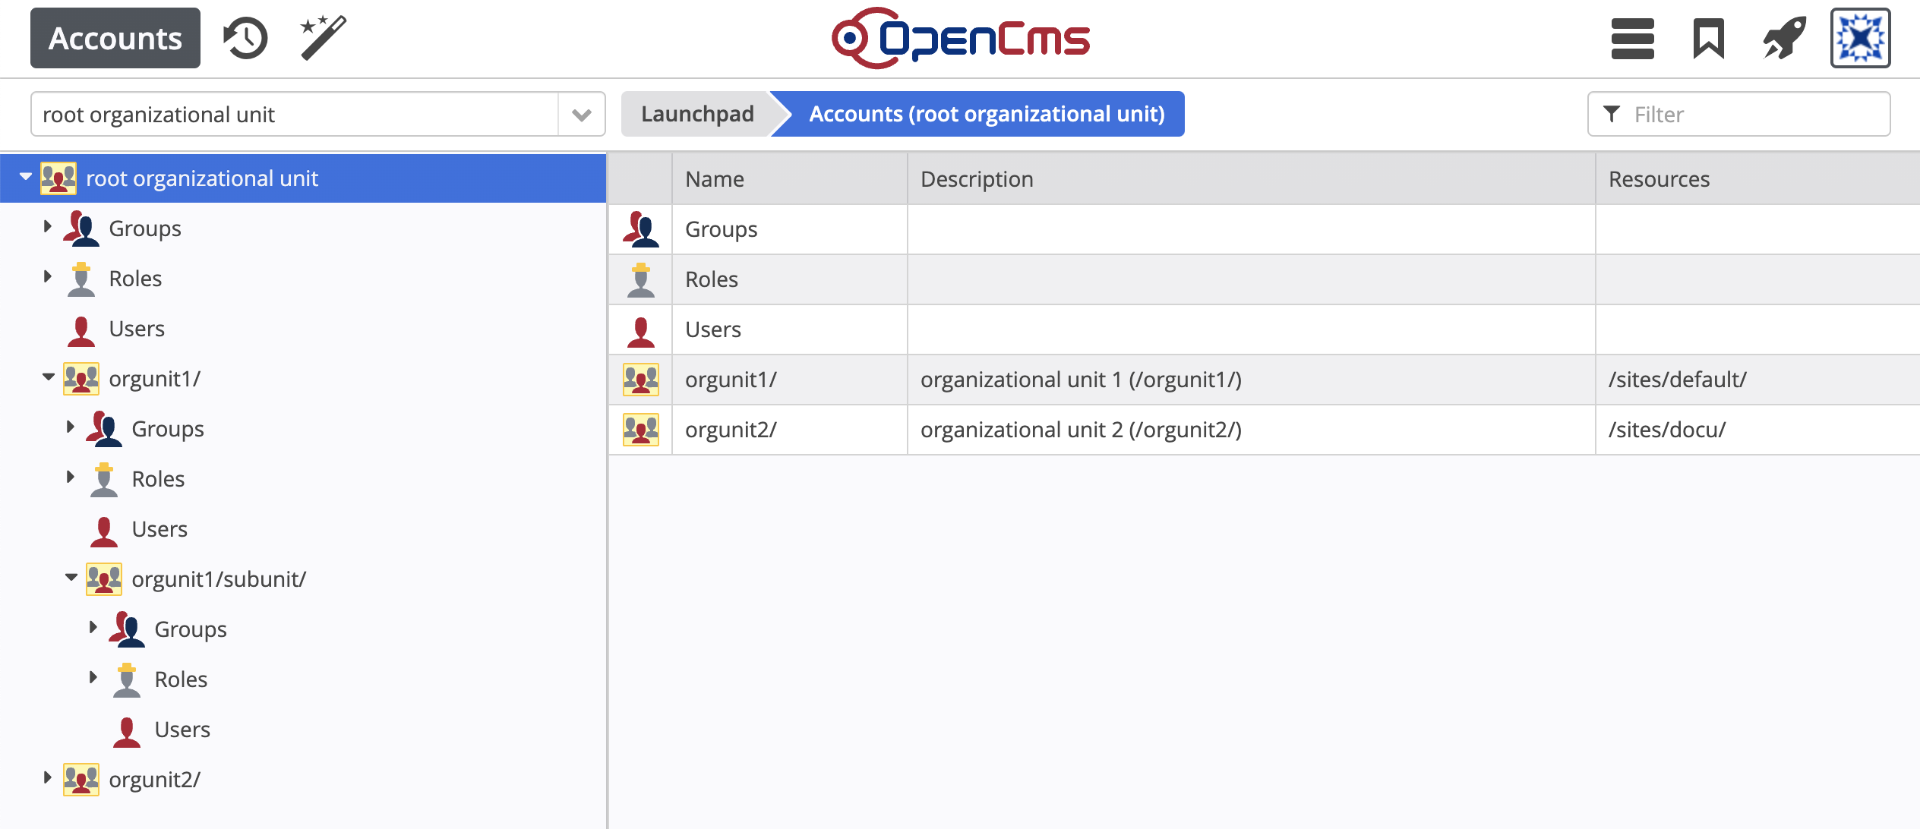
The screenshot shows the user interface of the accounts app as it appears to the administrator of the root organizational unit.

  • On the left-hand side, there is a tree navigation that can be used to navigate through the groups, users and roles of the root organization, as well as through the groups, users and roles of all sub-organizations, where a sub-organization can in turn contain other sub-organizations.
  • There is a select box above the tree navigation, which can be used to restrict the tree to a single sub-organization and its sub-organizations.
  • On the right-hand side there is a table in which the individual groups, roles, users and sub-organizations of the organization selected in the tree navigation on the left are listed.
  • Finally, there is a filter field on the right above the table, which is particularly useful for filtering long user lists.
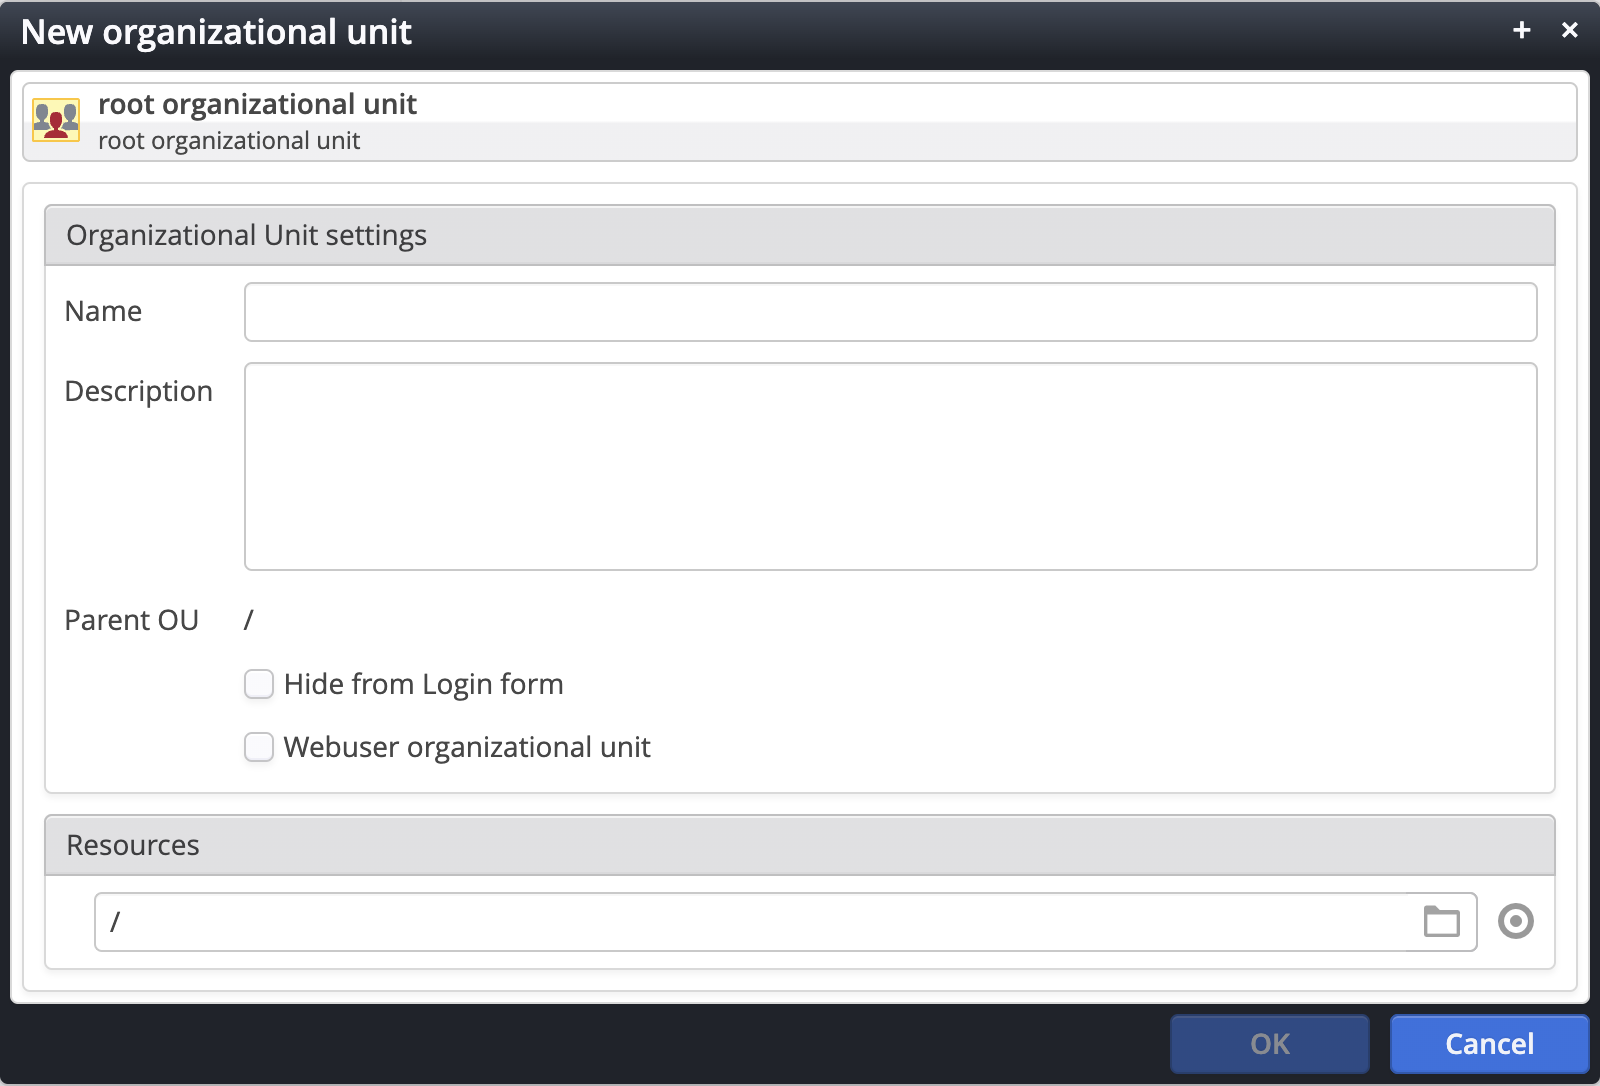
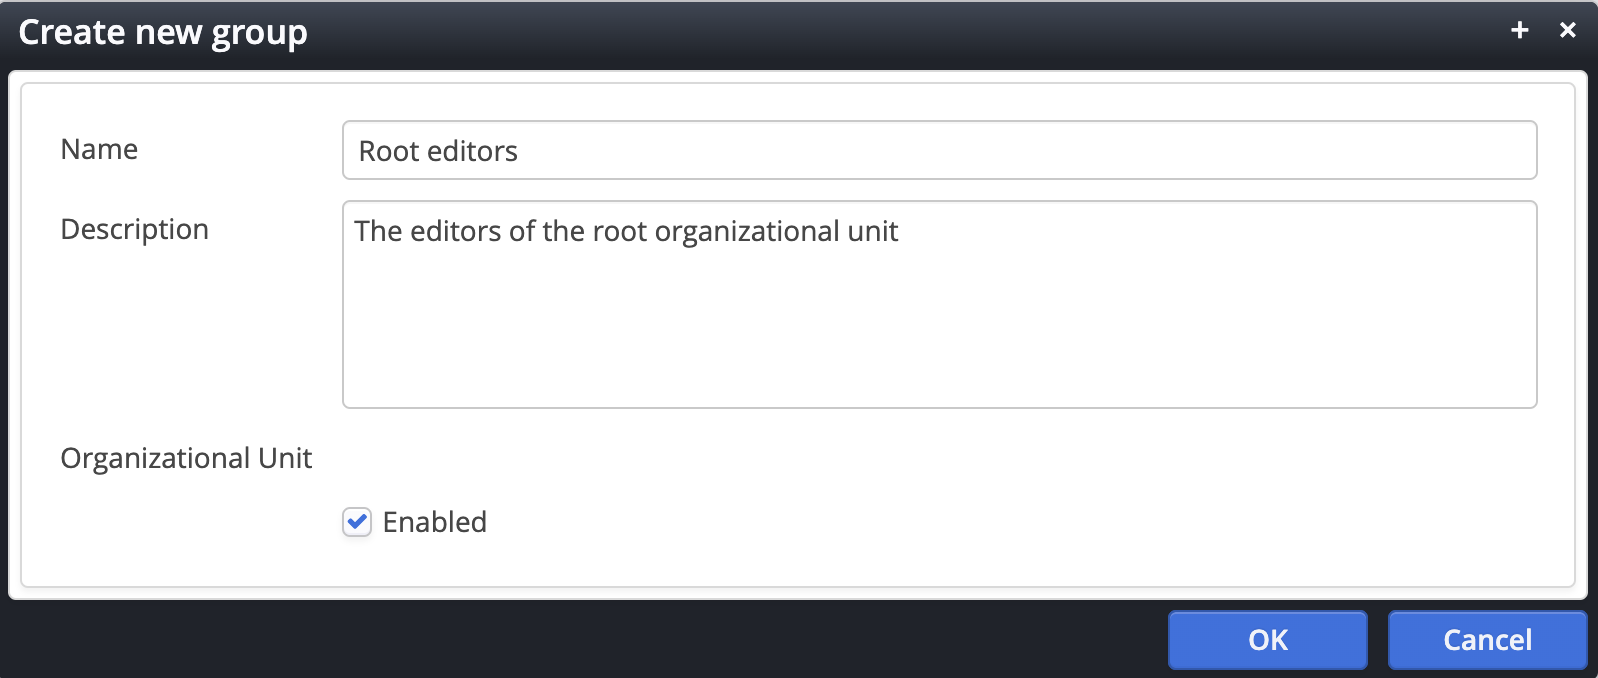
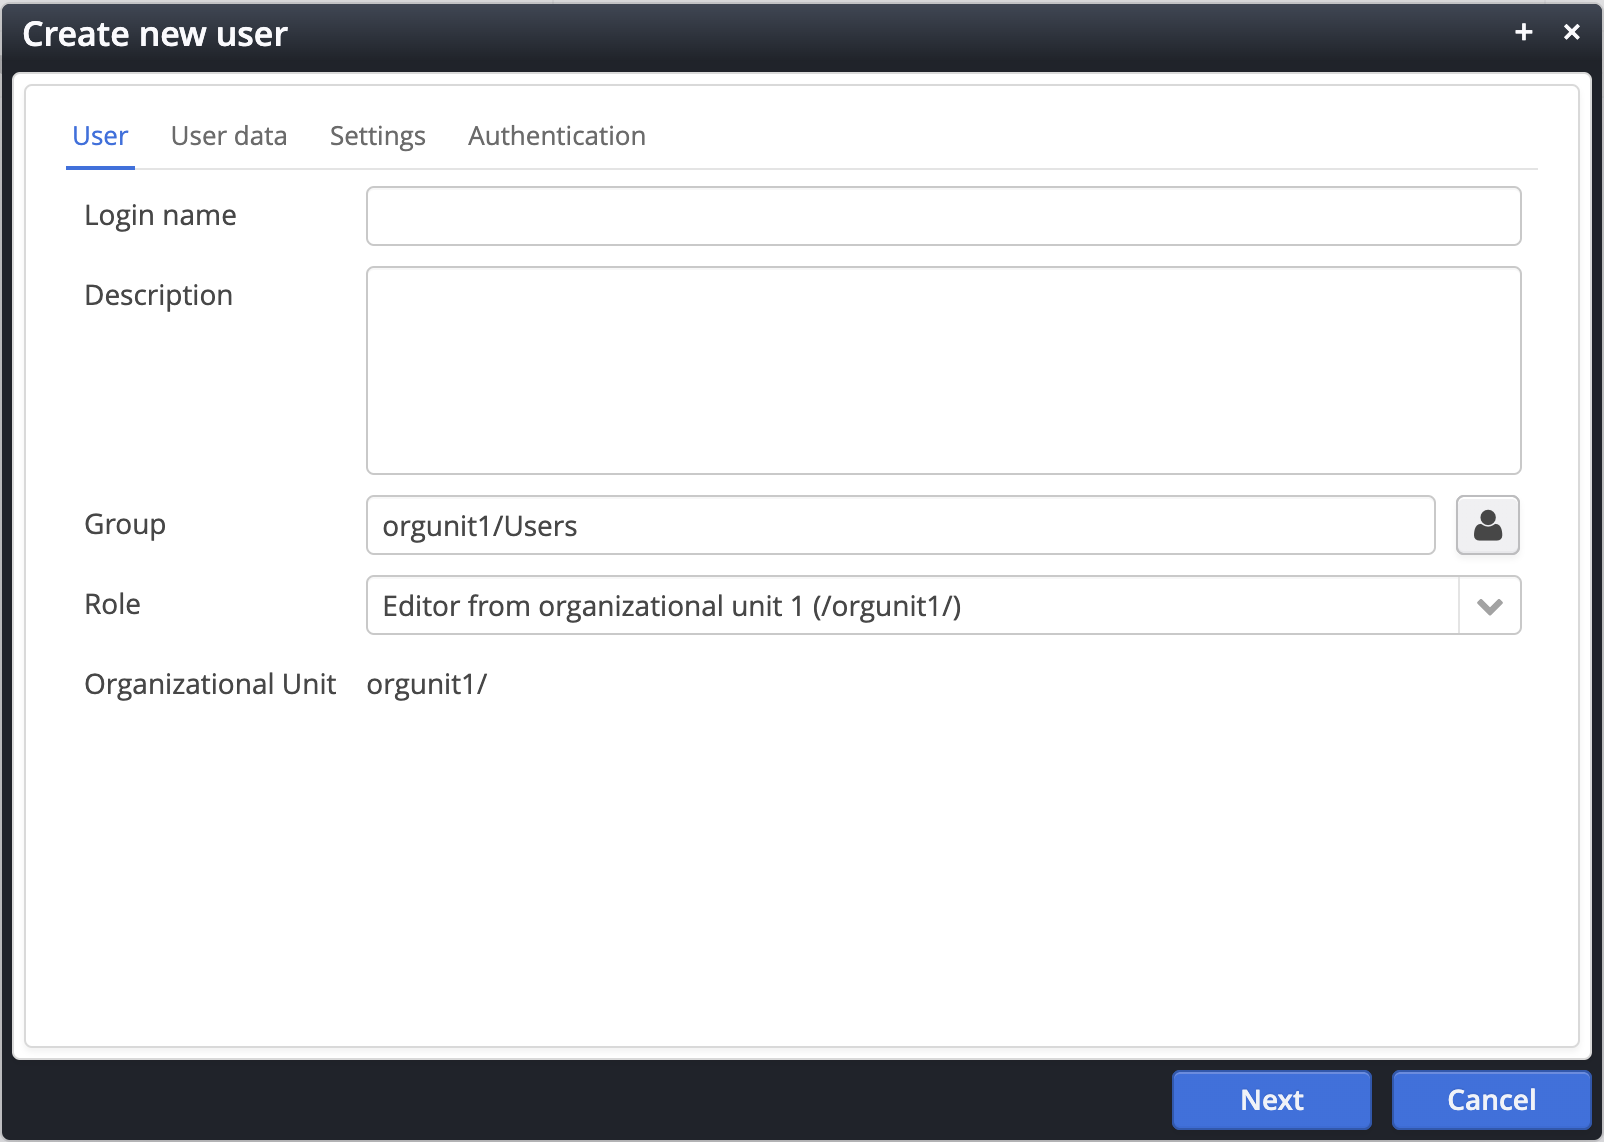
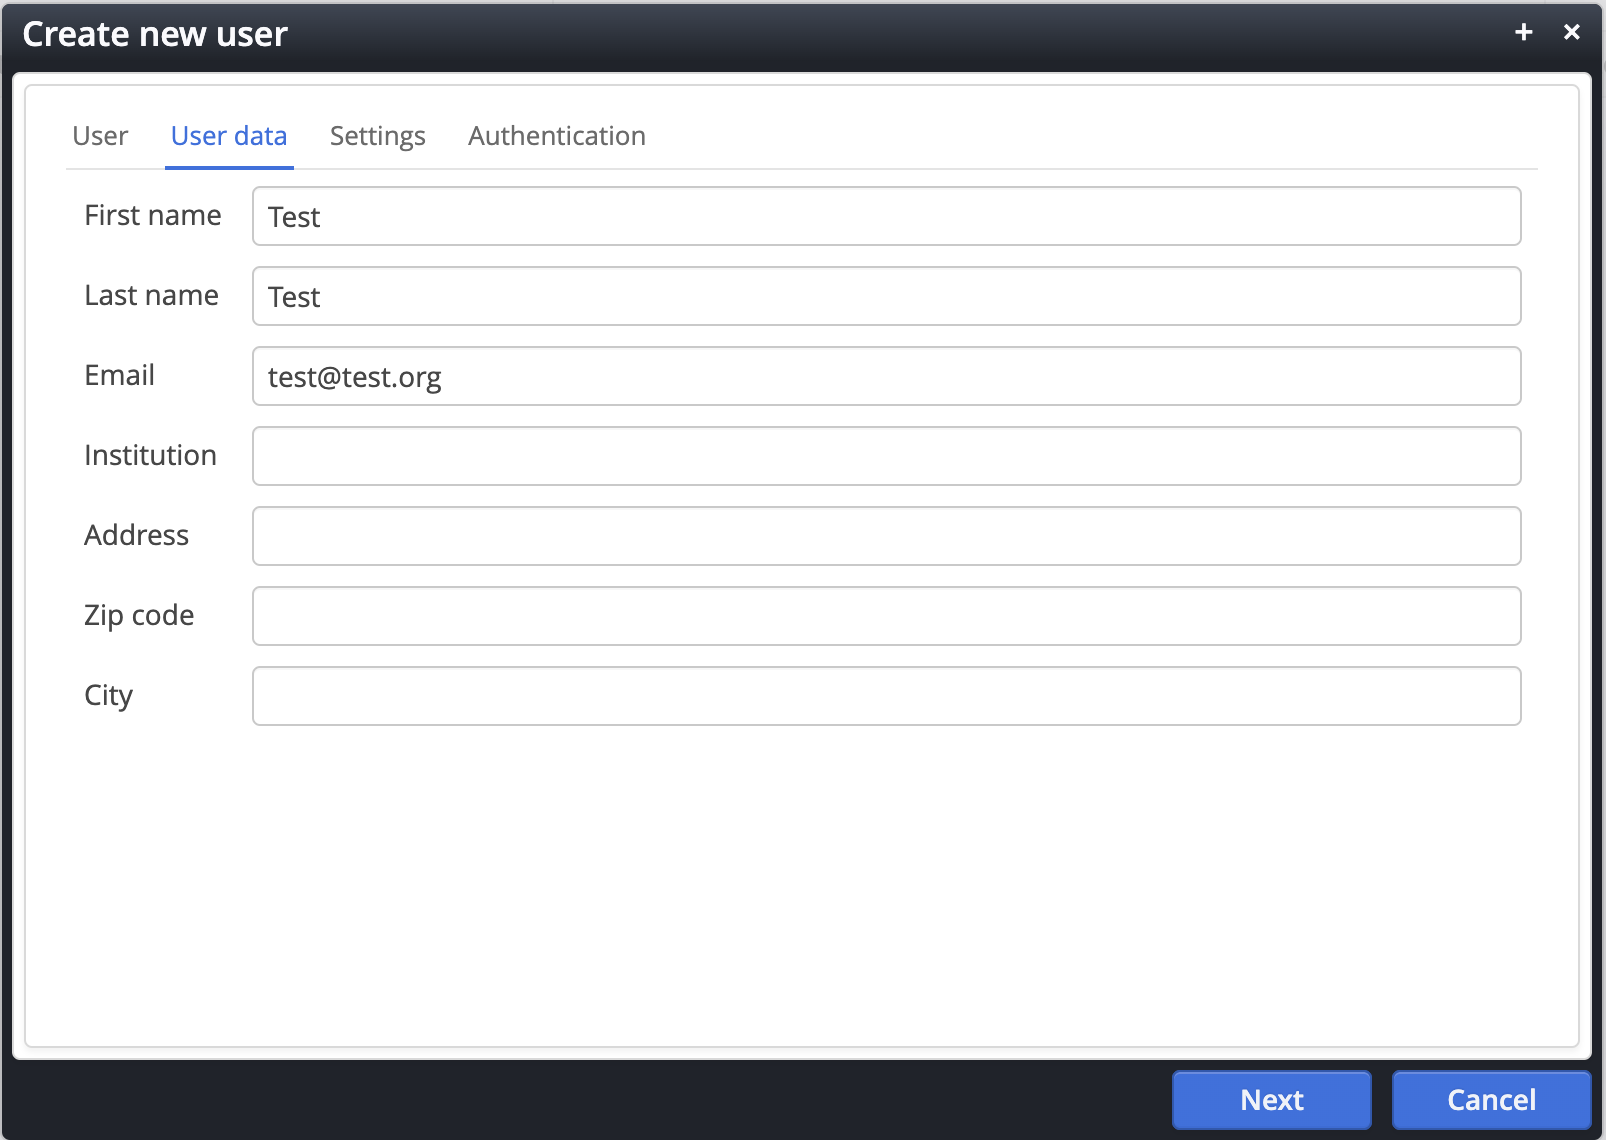
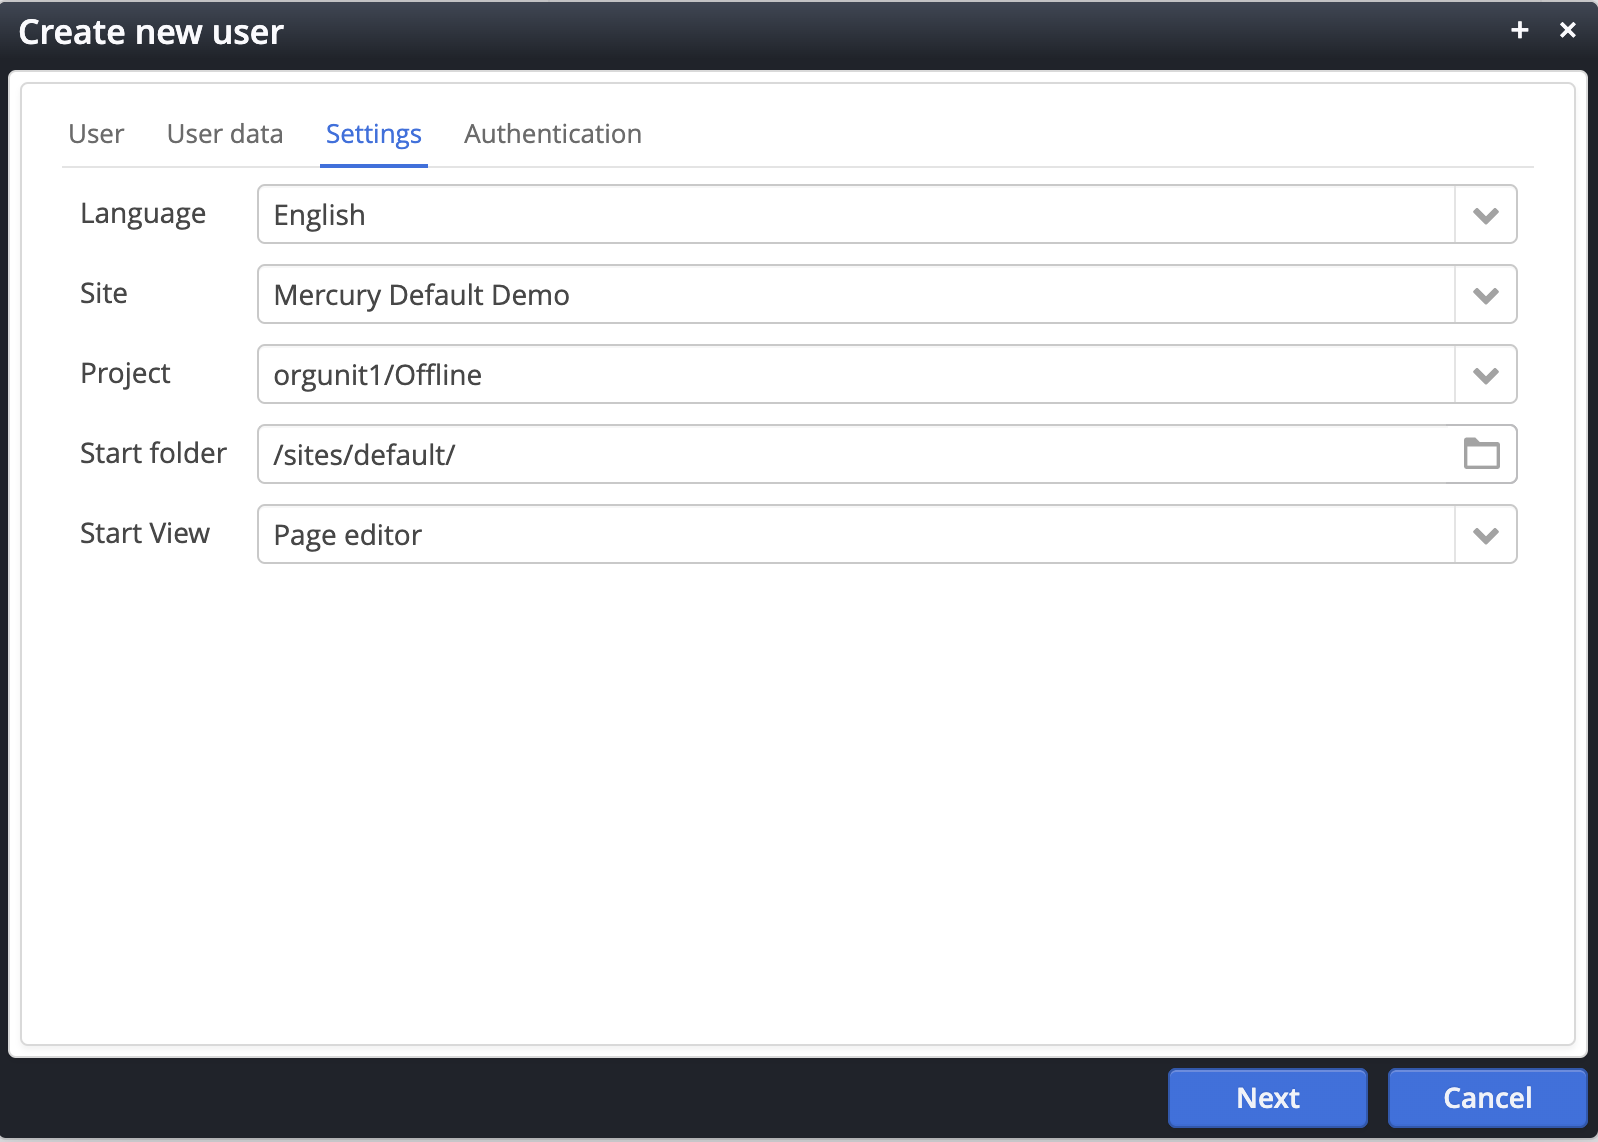
  • At the top in the main menu, there is especially the wand icon, which can be used to create new organizational units, groups and users.

The user interface would look differently if you were not logged in as the administrator of the root organizational unit but as the administrator of a sub-organizational unit. In this case, only your own sub-organizational unit and your sub-sub-organizational units would be displayed.

The root organizational unit is preset in the system. Any number of additional sub-organizational units can be created.

The new organizational unit dialog

When clicking on the wand icon in the main toolbar and after selecting New organizational unit, a dialog appears with the following options:

Name. The name of the organizational unit as it appears on the login form. The name may not contain any whitespace characters.

Description. A short description for the organizational unit.

Hide from Login form. Selecting this option hides the organizational unit from the login form. In this way, for example, one can temporarily prevent login for all accounts of an organizational unit.

Webuser organizational unit. If this option is selected, the accounts do not have workplace access but only access to a part of a website with login. 

Resources. The resources belonging to the organizational units. This means that the administrators of the newly created organization can assign permissions to the resources selected here only. Especially, the administrators cannot set permissions of other organization's resources. Permissions (ACLs) of the organizational unit (formerly) set outside the resources selected here have no effect.

The create new organizational unit dialog respects the context selected in the navigation tree on the left side, respectively the currently selected organizational unit in the table. In order to create a new sub-organization, select the organization in the tree navigation or in the table at first.

The organizational unit context menu

When clicking on the table row of an organizational unit, a context menu appears with the following options:

Open. Opens the organizational unit in the table.

Edit OU. Opens a dialog to edit the organizational unit's data.

CSV transfer. Opens a dialog to import and export users of the organizational unit.

Delete organizational unit. Opens a dialog to delete the organizational unit.

For each suborganizational unit, there is one predefined group available called Users. Any additional number of groups can be created for an organizational unit.

The Users group is just a technical group used internally when applying roles to a user. Roles can only be applied to an account, if it is part of the Users group. When creating a new organizational unit, it is thus best practice to create a new "real" group, e.g., an Editors group to which all editors will belong to.

The create new group dialog

When clicking on the wand icon in the main toolbar and after selecting Create new group, a dialog appears with the following options:

Name. The name of the group.

Description. A short description for the group.

Organizational unit. Shows the organizational unit of the group.

The Enabled checkbox allows to enable or disable the group.

The create new group dialog respects the context selected in the navigation tree on the left side, respectively the currently selected organizational unit in the table. In order to create a group for a specific organization, select the organizational unit in the tree navigation or in the table at first.

The group context menu

When clicking on the table row of a group, a context menu appears with the following options:

Open. Opens the group in the table.

Edit group. Opens a dialog to edit the group's data.

Show permissions. Shows all permissions attached to the group.

CSV transfer. Opens a dialog to import and export users of the group.

Delete organizational unit. Opens a dialog to delete the group.

As like users, groups are always attached to one specific organizational unit. A group cannot belong to more than one organizational unit.

The root organizational unit has two more predefined groups called Administrators and Guests. For more information on those predefined groups, read here.

Roles can be used to define which functionalities a user is allowed to access.

There is a total of 14 predefined roles in the system; no additional roles can be added.

For more information on assigning roles to a user, see below.

The roles table in the accounts app.

A more detailed description on the available roles is given here.

There is one predefined user called Admin. The Admin user is part of the as well predefined Administrators group of the root organizational unit. This Admin user has access to all functionalities and resources.

Any number of additional users with individual groups and roles can be created, where a user always is linked to one specific organizational unit. A user cannot belong to more than one organizational unit.

Users are always created by another user with role Administrator or representatively with role Account manager of the same organizational unit or a parent organizational unit. There is no possibility of self-registration for workplace users.

When clicking on the wand icon in the main toolbar and after selecting Create new user, a dialog with four tabs appears:

The first tab of the create new user dialog

User tab

Login name. The login name, may not contain any whitespace characters.

Description. Short description for the user.

Group. The initial group of the user. Additional groups can be added later.

Role. The initial role of the user. Additional roles can be added later.

Organizational unit. Information about the organizational unit currently selected.

The second tab of the create new user dialog

User data tab

First name. The first name of the user (required).

Last name. The last name of the user (required).

Email. The email address of the user (required).

Institution. Optional user information.

Address. Optional user information.

Zip code. Optional user information.

City. Optional user information.

The third tab of the create new user dialog

Settings tab

Language. The preferred workplace language for the user.

Site. The website that is preselected after the user has logged in.

Project. The project that is preselected after the user has logged in.

Start folder. The website folder that is preselected after the user has logged in.

Start view. The workplace app that is preselected after the user has logged in.

The fourth tab of the create new user dialog

Authentication tab

Enabled. Enables or disables the user. If disabled, the user cannot login to the workplace any more.

Self management. Controls if the user is allowed to edit his own user data and especially if the user is allowed to change its password.

Force new password on next login. Forces the user to set a new password on next login.

Send email with password to user. Sends an automatic standard email with all relevant account information to the user.

Generate random password. Opens a small dialog with a random password. The password can be copied to the clipboard. After confirming and closing the dialog, the following two fields are pre-filled with the password.

New password. The new password.

Confirm password. Confirmation of the new password.

The create new user dialog respects the context selected in the navigation tree on the left side, respectively the currently selected organizational unit in the table. In order to create a user for a specific organization, select the organizational unit in the tree navigation or in the table at first.

The user context menu

When clicking on the table row of a user, a context menu appears with the following options:

User information. Opens the user information dialog showing all basic user data.

Edit user. Opens the edit user dialog, which provides basically the same options as the Create new user dialog.

Edit roles. Opens the Edit roles dialog to attach additional roles to or to remove roles from a user.

Edit groups. Opens the Edit groups dialog to attach additional groups to or to remove groups from a user.

Additional infos. Opens the Additional infos dialog for the fine-grained setting of user preferences.

Show permissions. Shows all permissions attached to the user. It is recommended to attach permissions to groups and not to users. Assign user permissions in very special cases only.

Switch to user. Opens a dialog to switch to the user and continue "as if you were logged in as this user". Useful to test the functionalities and resource permissions of a user account after adding roles or groups to a user or after changing resource permissions.

Move user. Opens a dialog to move the user to another organizational unit.

Delete user. Opens a dialog to delete the user.

Destroy session. Logs the user out.

The edit roles dialog

The dialog is divided into a left-side panel and a right-side panel. The left panel contains the roles currently applied to the user, the right panel shows all available roles.

Any of the 14 available roles can be applied to a user.

  • In order to apply a role, click on one of the plus icons on the right panel, which moves the role to the left-side panel.
  • In order to remove a role, click on one of the minus icons on the left panel, which moves the role to the right-side panel.

Some roles on the left panel appear grayed out. This is since roles are organized hierarchically, meaning, that some roles inherit the functionalities of other roles. In the screenshot it can be seen that the Editor role inherits all functionality of the Element author role.

The edit groups dialog

As like the edit roles dialog, the edit groups dialog is divided into a left-side panel and a right-side panel. The left panel contains the groups currently applied to the user, the right panel shows all available groups.

Any group of the organizational unit the user is part of can be applied to a user and also any group of all sub-organizations and sub-sub-organizations.