The page editor appears, when you open a page in the Offline project. Moreover, you can open it from any other workplace app via the quick launch menu.
The page editor is the main app that allows to add, arrange and edit contents on a page. Moreover, it provides access to all necessary user tasks related to the page.

-
Opens the Publish dialog for publishing your changes.
-

Opens the clipboard, where favorites and recent changes can be accessed.
-
Opens the Add content dialog which allows to add content to a page by drag & drop.
-

-
Allows to display information about the current page and its elements. If elements on the page have unpublished changes, the symbol is marked with a red dot.
-

-
Shows the Context menu for the current page.
-
-

The icon shows a user specific configurable picture. It provides access to user information, preferences and the logout button.
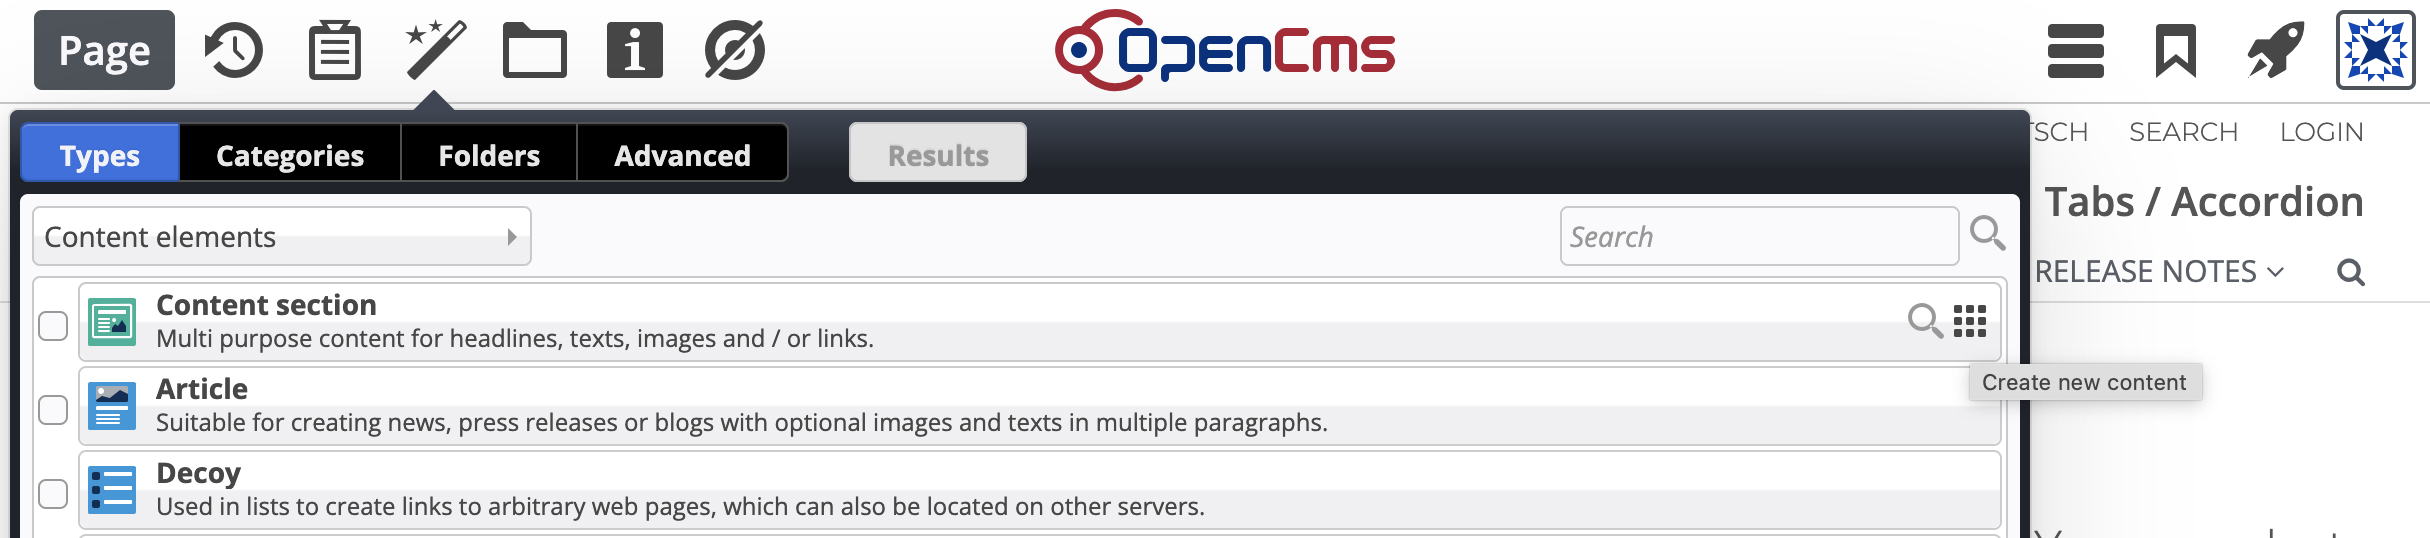
Clicking on the Add content icon ![]() opens the gallery dialog and shows a list of all possible content types that can be added to the current container page. Content types are grouped in element views, which can be changed via the dialog's drop-down menu.
opens the gallery dialog and shows a list of all possible content types that can be added to the current container page. Content types are grouped in element views, which can be changed via the dialog's drop-down menu.
This dialog enables the content editor to create new content and also to retrieve existing contents.
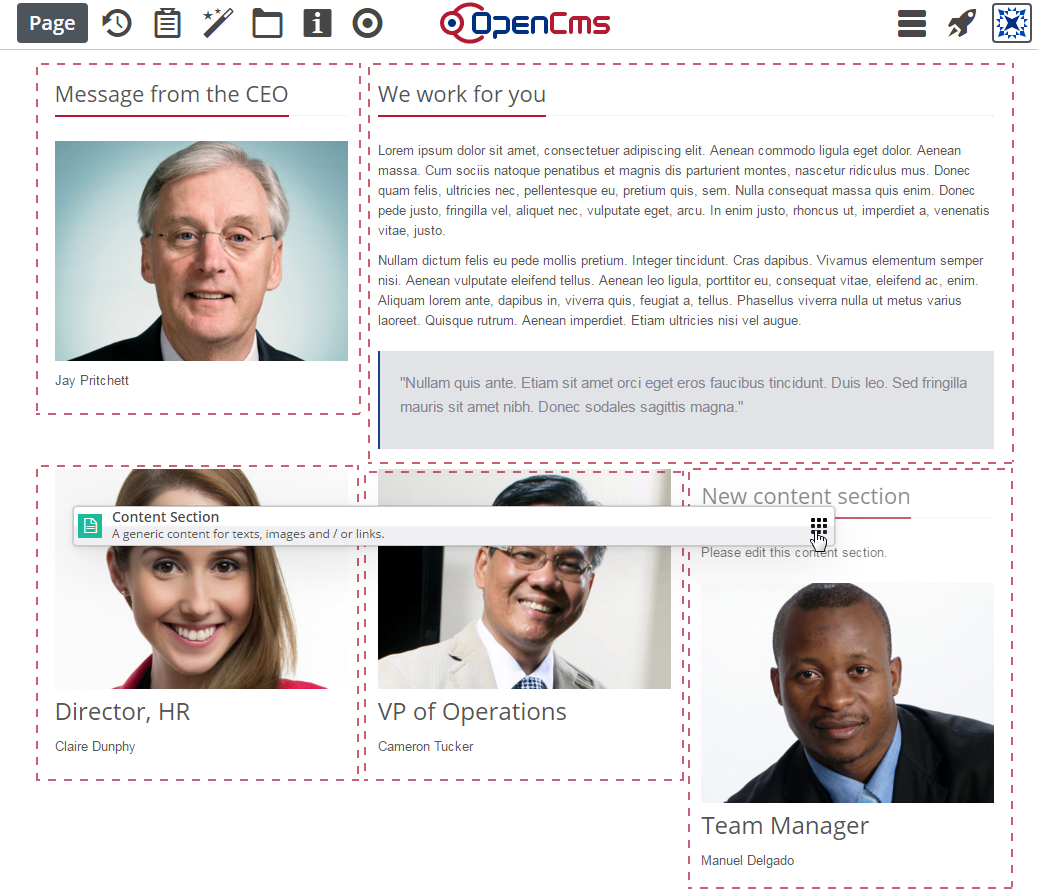
In order to create a new content, hover an element type like Content section, press the left mouse button on the 9 dots and start dragging the element type to the page.
While dragging an element, all places are highlighted where the element can be dropped:
Alternatively to dragging and dropping there is a 'place element' mode. It is activated by briefly clicking on the button with the 9 dots instead of dragging.
If the 'place element' mode is active, special markers are displayed on the page to indicate where the element can be placed:
- An 'up arrow' or 'down arrow' inserts the element at the beginning or end of a container.
- A 'plus' inserts the element between two existing elements or into an empty container.
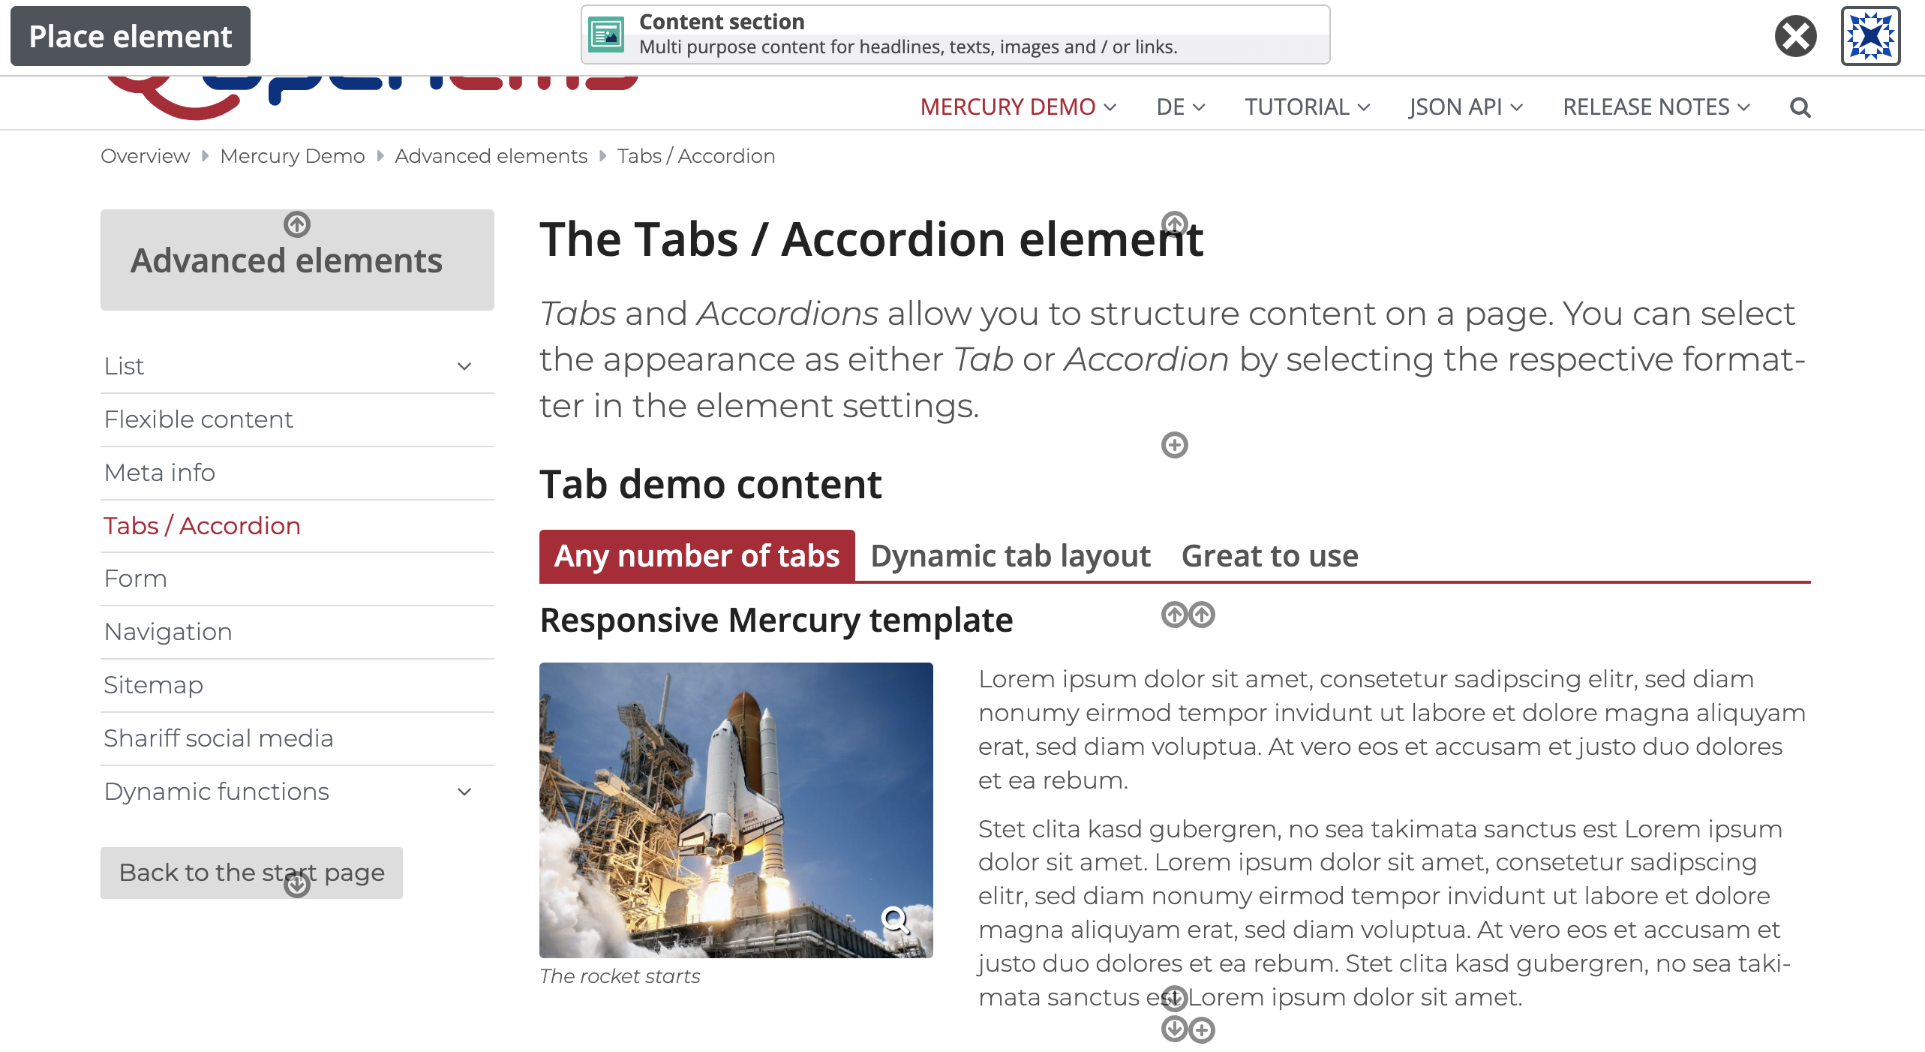
If an element has been inserted or moved, the 'place element' mode is ended automatically.
The mode can also be ended manually by clicking anywhere on the page outside the buttons.
The 'place element' mode is available also for the inline content editor.
In order to reuse existing content, click on the Add content icon ![]() , select one or more resource types and click on the results tab. If you want results from only one type, you can also simply click on that type. All elements displayed can be dragged onto the page. You can refine your search by selecting single or multiple criteria in each tab (Types, Categories, Folders and Advanced). A click on the results button will refresh the result list containing all contents matching your given criteria.
, select one or more resource types and click on the results tab. If you want results from only one type, you can also simply click on that type. All elements displayed can be dragged onto the page. You can refine your search by selecting single or multiple criteria in each tab (Types, Categories, Folders and Advanced). A click on the results button will refresh the result list containing all contents matching your given criteria.
Note that only contents available in the page's language are shown as long as you do not change the language via the "Advanced" tab.
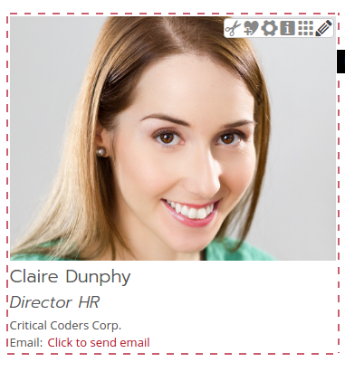
When hovering above the edit point ![]() of an element an optionbar becomes visible offering the following options.
of an element an optionbar becomes visible offering the following options.
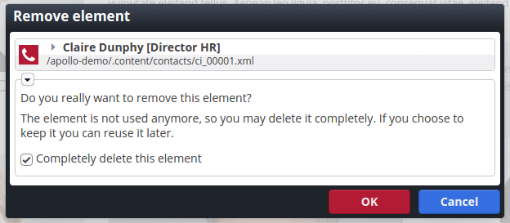
To remove an element from the page, click on the remove ![]() option. A dialog will be shown asking you to confirm this action.
option. A dialog will be shown asking you to confirm this action.
This will not delete the element content but will only remove the reference to it from this page.
In case there are no other pages referencing this content element, the remove dialog will offer to completley delete the element.
This dialog can be configured to
- offer the delete option preselected (default)
- offer the delete option not preselected
- not to offer the delete option
- always delete without asking
This is done by editing the configuration file '/WEB-INF/config/opencms-workplace.xml' in the RFS. Add the element <element-delete-mode> as last element with one of the following values: [askDelete,askKeep,alwaysKeep,alwaysDelete].
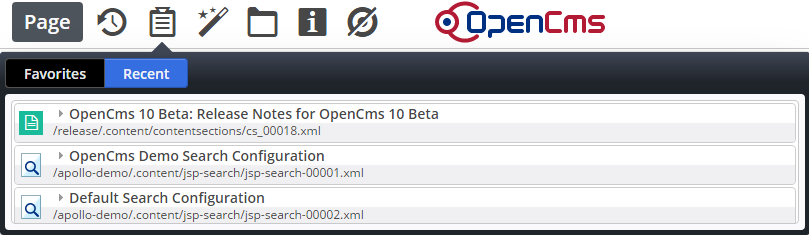
By clicking on the on the Clipboard icon ![]() in the toolbar you can access your personal favorites and a list of elements you have recently used. You can directly add content from the clipboard to your page by drag & drop.
in the toolbar you can access your personal favorites and a list of elements you have recently used. You can directly add content from the clipboard to your page by drag & drop.
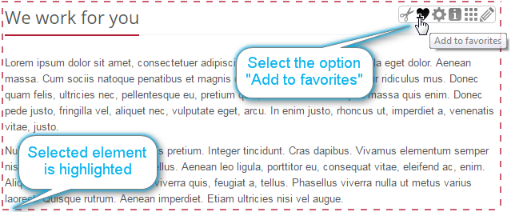
You can add a content element to your favorites by using the ![]() Add to favorites option shown when hovering over the element's edit point.
Add to favorites option shown when hovering over the element's edit point.
By selecting the Context menu ![]() icon from the toolbar you can select the following options.
icon from the toolbar you can select the following options.
Available Options
- Properties
Display and edit the OpenCms properties of the current container page.
- Page info
Show the elements used on the page, page attributes, like date created, date last modified, etc. and links to the page.
- Element view
Shows the available element views and allows to switch the element view.
- Edit small elements
If elements that do not have a certain height edit points for these elements are only shown when this option is checked.
- Advanced > Availability
Opens the availability dialog.
- Advanced > Lock report
Lock state report of current container page.
- Advanced > SEO options
Tweak Search Engine Optimization options.
The page info dialog shows additional metadata alongside some general information about the container page, including: the page’s title, its resource type, file size, resource state (new, changed, deleted, etc.) and the information about who and when the page was created. Moreover, it shows the last modification date and the project the page belongs to. The language and the permissions the current user has are display also.
Furthermore, you get information about the elements used on the page and the resources that link to the page.
Container page elements can be grouped in views by their type. If elements are not in the view you currently work in, edit points on the elements are hidden and also the Add content does not provide the option to add such elements.
The context menu option "Element view" is only shown if more than one such view is available (and non-empty with respect to the available content types). Each user can also choose his default element view via the user preferences.
Besides via the context menu, the element view can also be switched in the Add content dialog. In that dialog an additional element view "System elements" is shown. By default it holds all the content types exposed by the OpenCms core.
Here you can learn more about element views, in particular how to configure them.
By selecting the Availability option from the context menu you can set several options concerning the container page’s online visibility.
Dates can be set by keyboard input or by using the calendar widget that appears when the date field is clicked.
The Lock report dialog displays the locking state for the current page. If the current page has been locked by another user you can retrieve information about the user and the according project here. This dialog is also able to consider inherited locks.
This dialog offers a mask that enables the content manager to set the most relevant properties for SEO of a container page, meaning: Title, Description and Keywords. Additionally it is possible to define aliases for the page. As for rewrite rules you can choose between sending a temporary redirect (302 returned) or sending a permanent redirect (301) or just show the page (200). Already set aliases are displayed below. Learn more on SEO options here.